# Setting up Development Environment
This page aims to guide you on how to set up the AddOn development environment. Before you begin, please download the development resources👈.
Developing AddOns requires an appropriate development environment. Related softwares and Apps are essential, including the JAKA virtual machine and compatible software and controller versions.
Tip:
If you already got a controller, then the virtual machine is not needed since you can directly use that controller to develop. ClickInstallTheAddOnSuite👈 to follow the instructions on installing and upgrading the controller and JAKA App, and then to install the AddOn suite.
# Install the JAKA Virtual Machine
# Step One: Install Virtual Machine Software
Developers need to first install virtual machine software, such as VirtualBox or VMware Player.
# Step Two: Install the JAKA Mirror File
Locate the virtual machine mirror file in the jaka_addon_package and import it for installation.
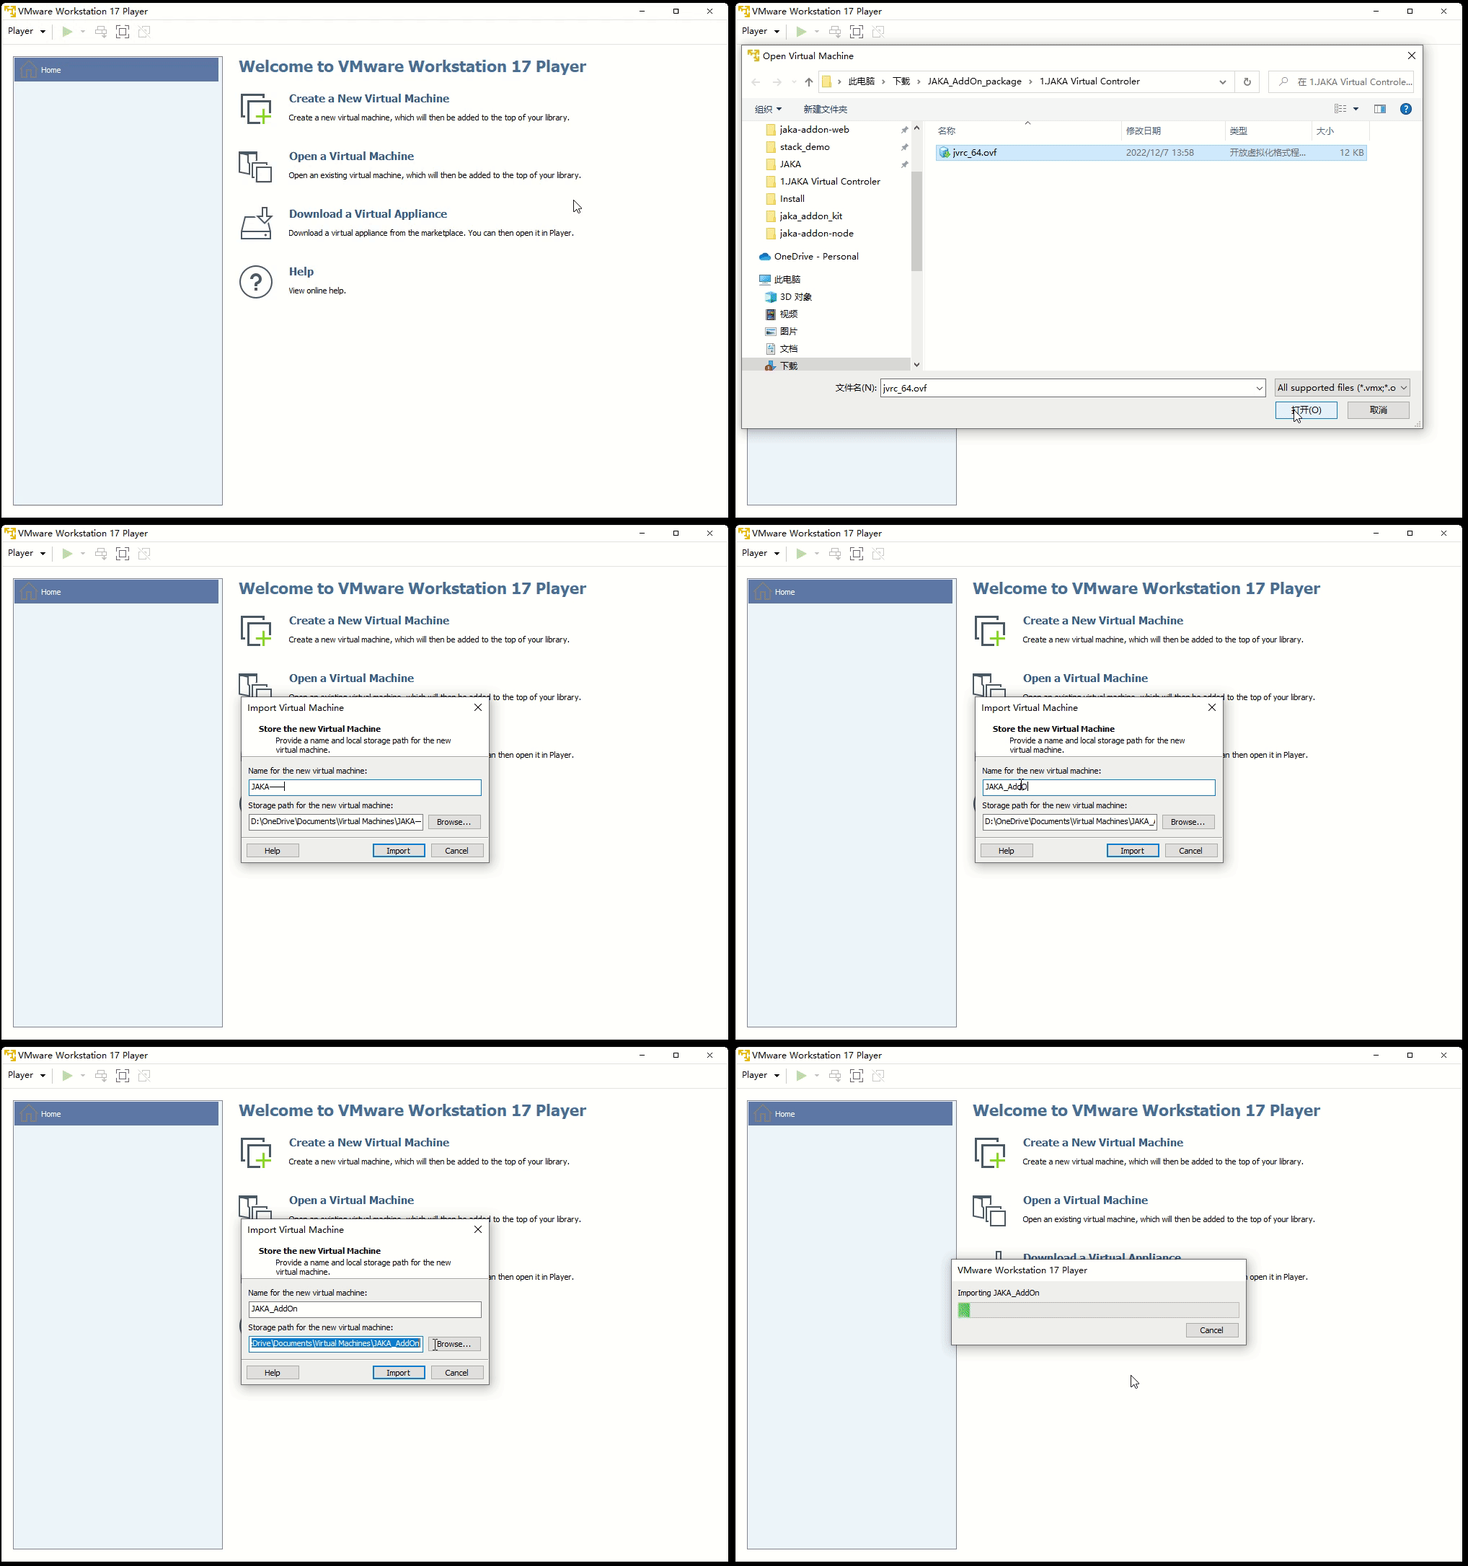
# Step Three: Start the JAKA Virtual Controller
Click "play virtual machine" to launch it.
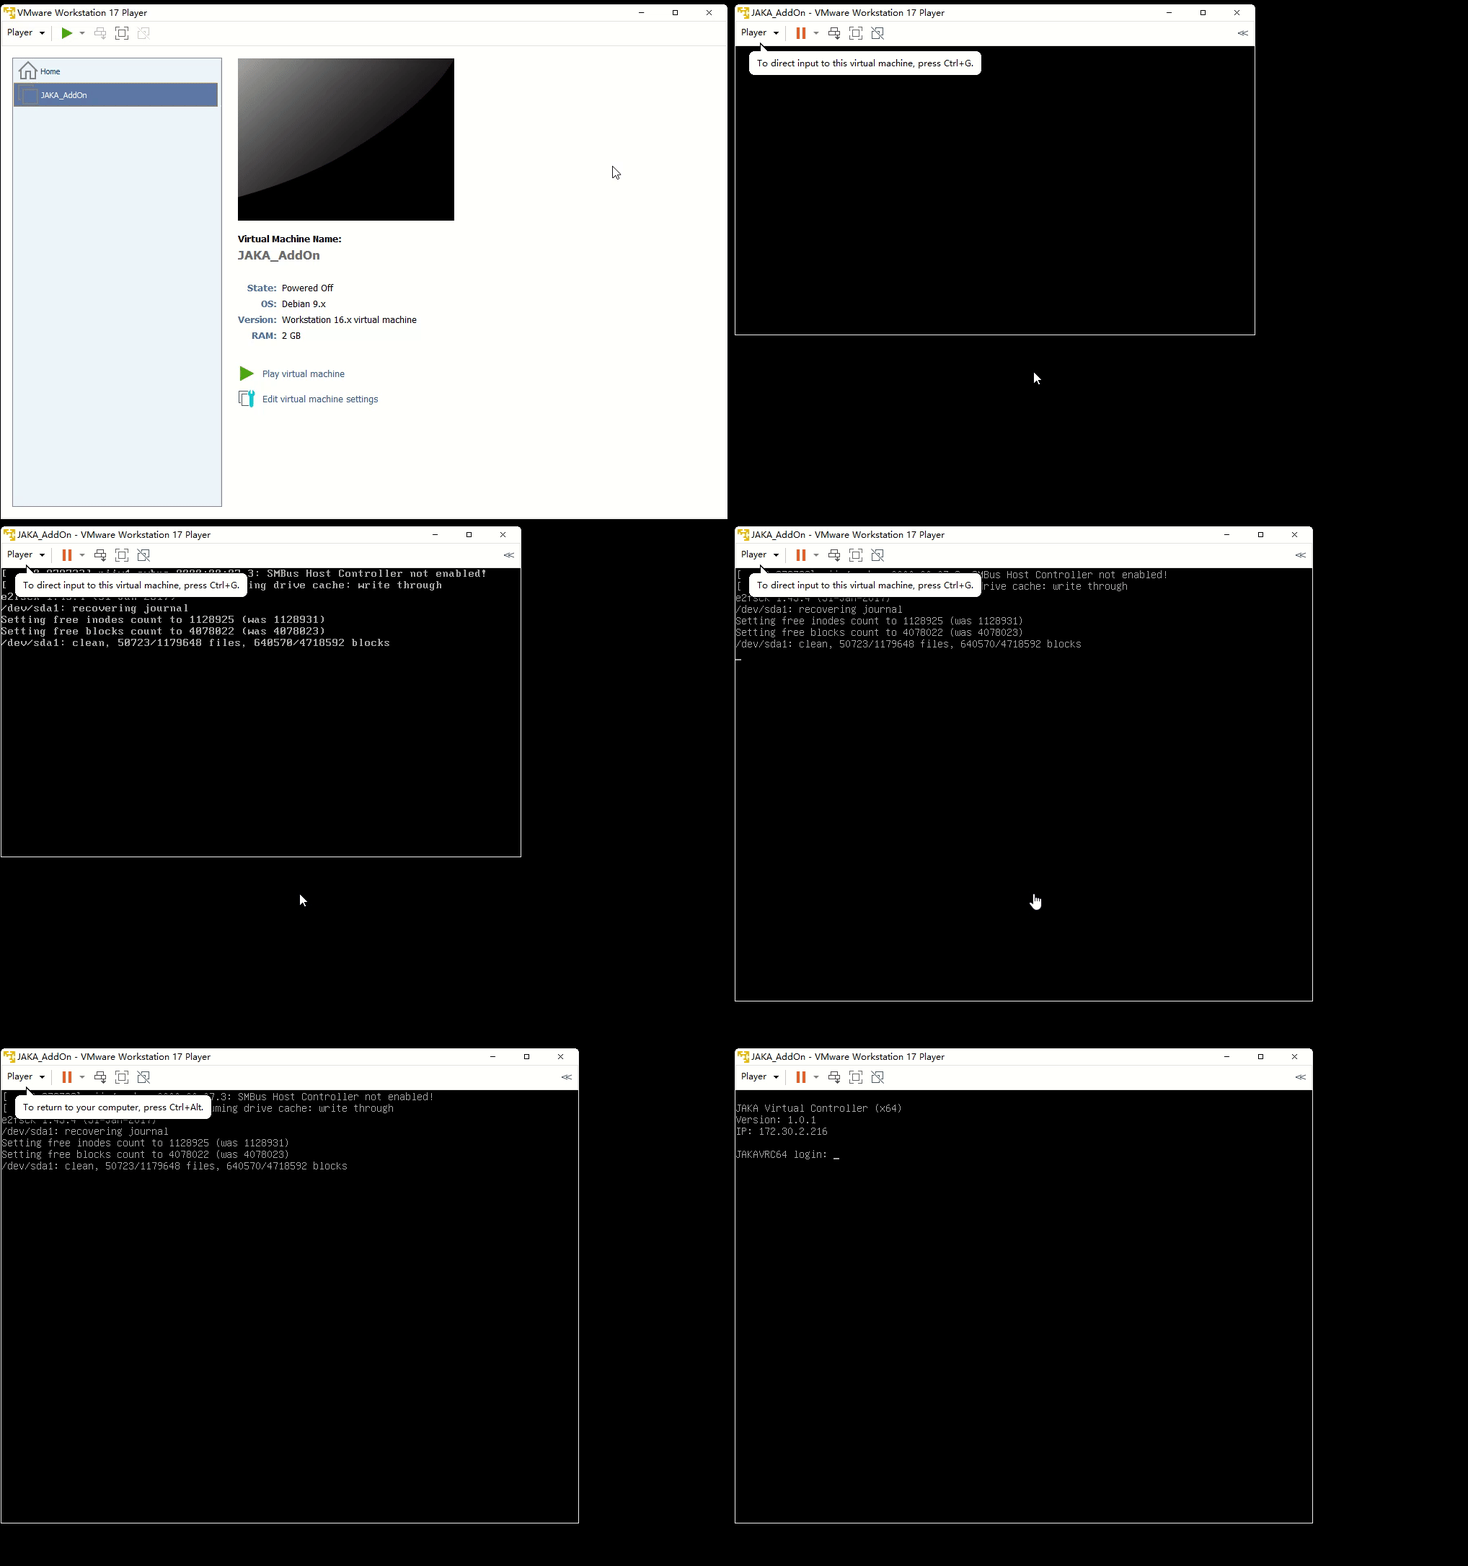
At this point, the virtual machine page will display the current robot's IP address.
# Install the AddOn Suite
Please note:
Apps and controllers that are not updated cannot support the AddOn function.
After setting up the virtual machine, you need to upgrade the App and controller to the compatible versions before the AddOn development.
# Step One: Install JAKA App
In the App folder of the AddOn development environment package, find the installation package and follow the guide to complete the installation of the App.
During the installation process, be sure to grant network permissions.
# Step Two: Connect the Robot Using the App
- Open the App to connect to the robot. At this point, you should be able to find the virtual robot in the robot list based on its IP.
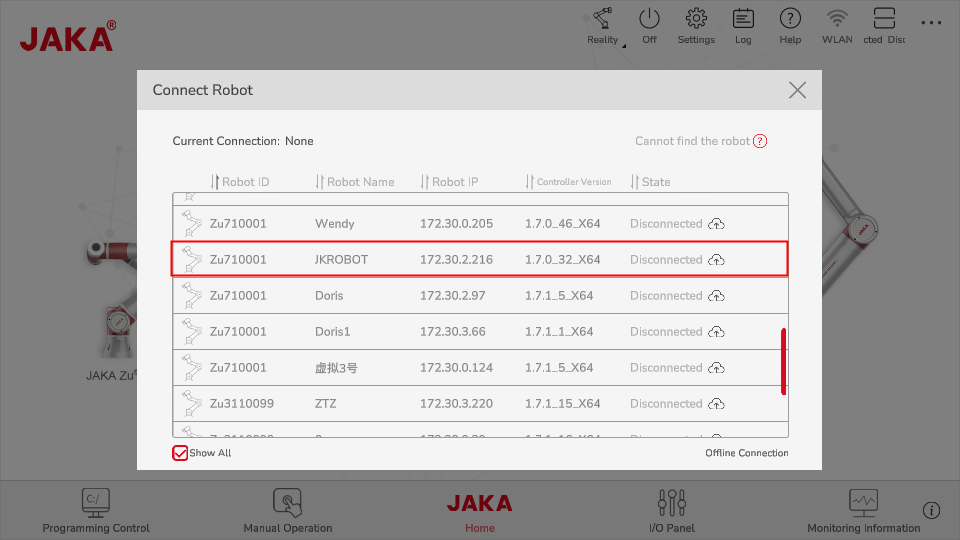
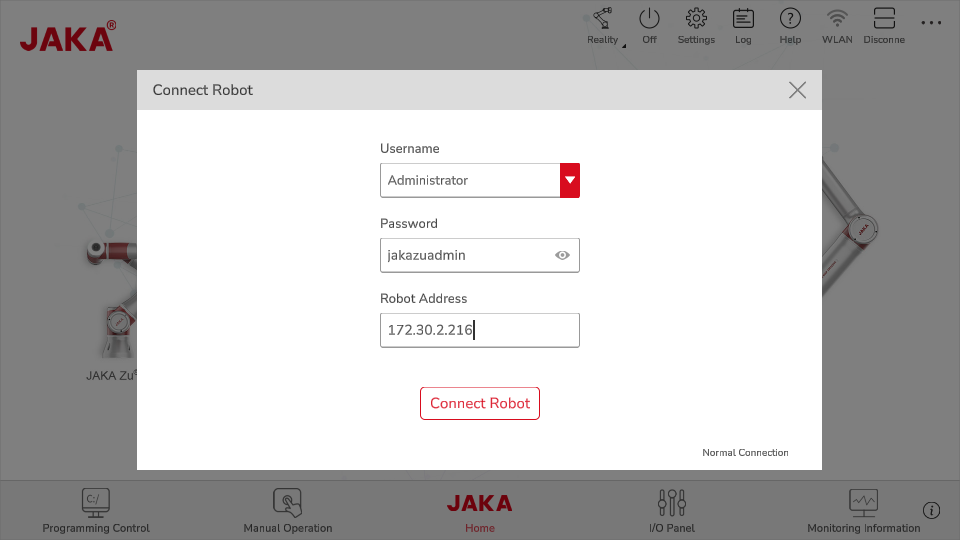
If you cannot find the robot in the list, try using offline connection.
For the password, enter the default login password (jakazuadmin).
For the address, enter the IP of the virtual robot.
Tip:
If the App is unmatched with the controller's version, thus the connection has failed, please install the matched version of App first, then upgrade the controller following instructions in Step Three.
# Step Three: Upgrade the Controller
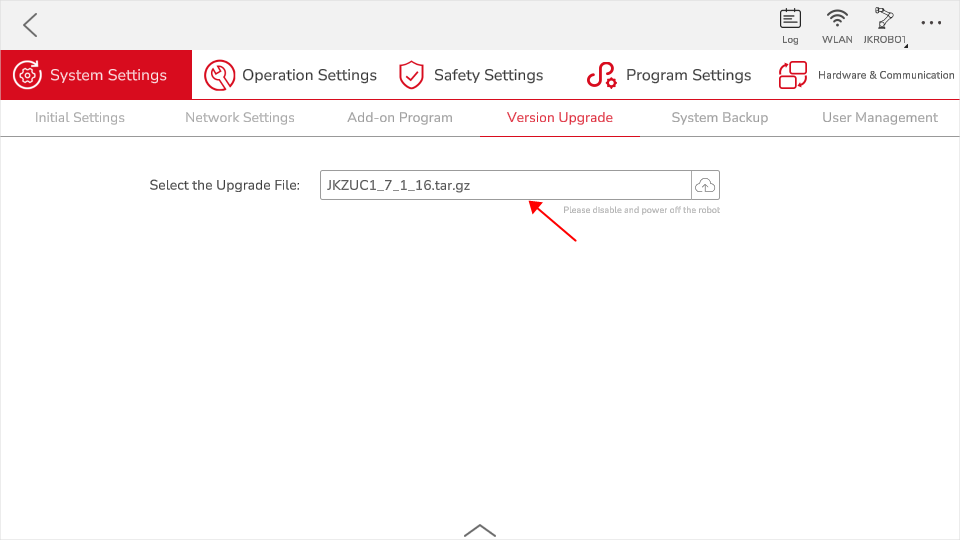
Open the settings page, go to System Settings, then the Version Upgrade page. Select the controller package you want to upgrade, click upload, and complete the upgrade.
# Step Four: Install the AddOn Suite
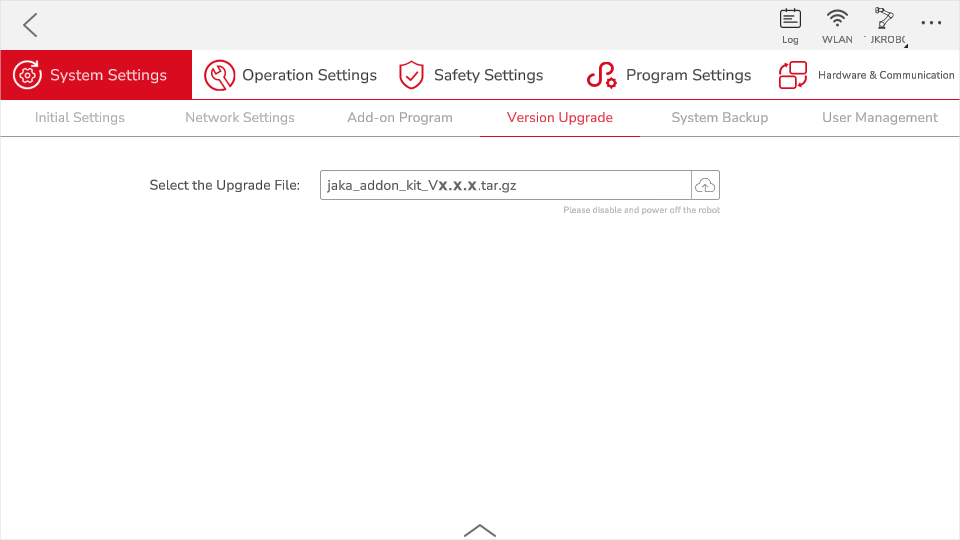
Open the settings page, go to System Settings, then the Version Upgrade page. Select the AddOn Suite, click upload, and complete the installation.
# Step Five: Restart the App
Please note:
After completing steps one to four, please restart the App to take effect.
